主题
图形化桌面环境
使用自带VNC的桌面
平台提供了一个专门带桌面环境的开发环境,并附带Linux版本的VScode。同样也附带了算力开发基础的PyTorch、cuda环境。可以在创建时直接选择。
自行安装noVNC+VNC+xfce桌面环境
:::tip
在没有自带桌面环境的系统中,可以自行安装。
noVNC、VNC、xfce
- xfce是Linux上的一种桌面环境、图形化界面技术。
- VNC是虚拟远程控制台技术的缩写,可以将桌面环境转化为远程控制的技术。本文使用turboVNC。
- noVNC是将vnc转化为web服务的程序,方便在浏览器进行远程访问。
1. 安装桌面环境,基于xfce的xubuntu-desktop
bash
apt-get update

# 如果提醒缺少python3,则先安装python3
# apt-get install python3 -y --allow-change-held-packages

apt-get install xubuntu-desktop -y
gnome
平台暂不支持gnome。请选择桌面环境注意辨别。
安装桌面过程中根据需要选择时区、语言和桌面管理器,其中桌面环境选lightdm,如下图 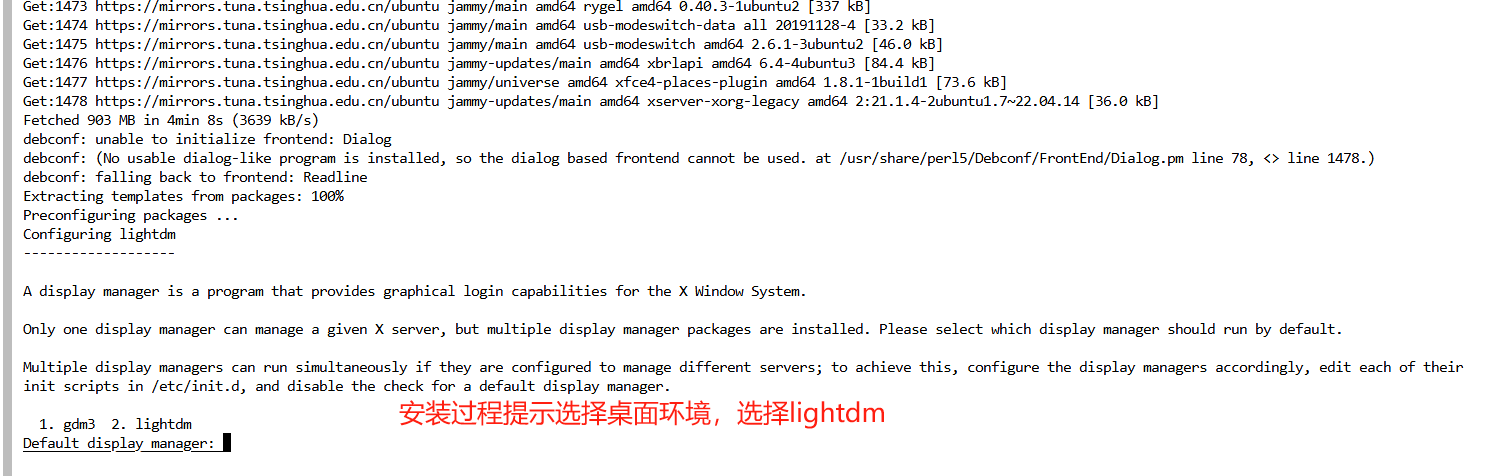
2.安装VNC(turboVNC)
turboVNC提供了ubuntu的第三方安装库,可以使用apt安装,较为简单。
bash
# 新增TurboVNC的安装地址和证书
wget -q -O- https://packagecloud.io/dcommander/turbovnc/gpgkey | gpg --dearmor >/etc/apt/trusted.gpg.d/TurboVNC.gpg
cd /etc/apt/sources.list.d
wget https://raw.githubusercontent.com/TurboVNC/repo/main/TurboVNC.list

# 安装
cd ~
apt-get update
apt-get install turbovnc -y
3. 启动与配置VNC
bash
# 查询程序安装位置
whereis vncserver
> /opt/TurboVNC/bin/vncserver
# 启动VNC
# -securitytypes none参数的含义为不设定密码。需要密码则去掉此参数
/opt/TurboVNC/bin/vncserver -wm xfce -securitytypes none
可以看到界面提示到VNC的日志位置: 
在日志文件中找到VNC端口:
bash
# 如果按流程操作,日志文件名不需要替换
cat .vnc/gpufree-container\:1.log | grep port
> 18/04/2025 16:12:13 Protocol versions supported: 3.3, 3.7, 3.8, 3.7t, 3.8t
> 18/04/2025 16:12:13 Listening for VNC connections on TCP port 5901
其他命令
bash
# 关闭VNC
/opt/TurboVNC/bin/vncserver -kill :1 # 关闭1号桌面,默认从1开始。全部关闭,将1替换为*
/opt/TurboVNC/bin/vncserver :1 # 启动已存在且关闭的1号桌面
VNC Viewer
如果希望使用VNC Viewer类软件,可以SSH隧道将远程端口(例如例子中的5901)映射到本地(参考帮助文档)。然后在VNC使用localhost:5901来连接。
4. 安装并启动noVNC
bash
# 安装
git clone https://github.com/novnc/noVNC
cd noVNC
# 启动
./utils/novnc_proxy --vnc localhost:5901 --listen 0.0.0.0:6080
在控制台->实例列表找到实例,在自定义服务中复制6080端口地址。在浏览器访问 <url>/vnc.html即可。一定要在后面加入vnc.html才能访问。
5. 参考
- 使用Tmux将整个过程作为后台程序使用,请查看Tmux教程。
- TurboVNC官方文档
- noVNC - GitHub